1.3. Generating the Design
Figure 4. Procedure
Follow these steps to generate the Arria 10 hardware example design and testbench::
- In the IP Catalog (Tools > IP Catalog), select the Arria 10 target device family.
Note: The Quick Start hardware design example is only supported in Arria 10 devices. The testbench is available for variations that target Arria 10 devices or Stratix V devices.
- In the IP Catalog, locate and select Low Latency 40 G Ethernet. The New IP Variation window appears.
- Specify a top-level name for your custom IP variation. The parameter editor saves the IP variation settings in a file named .
- You must select a specific Arria 10 device in the Device field, or keep the default Quartus Prime software device selection.
- Click OK. The parameter editor appears.
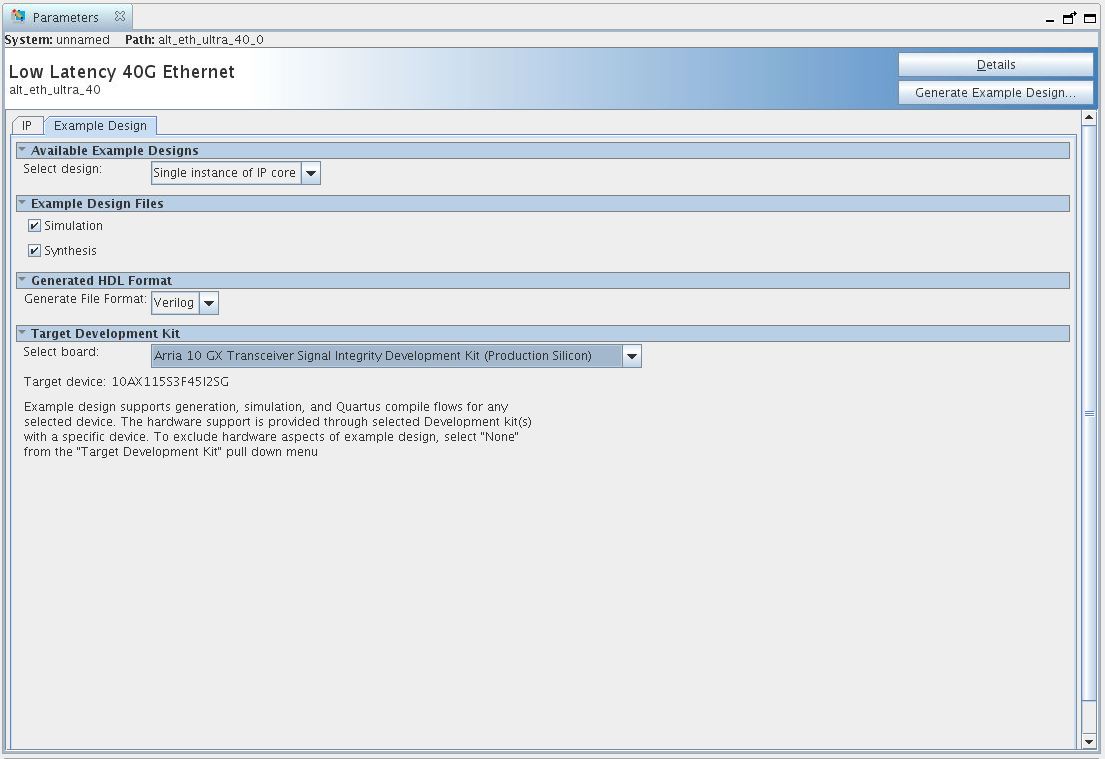
Figure 5. Example Design Tab in LL 40 GbE Parameter Editor
- On the IP tab, specify the parameters for your IP core variation.
Note: The LL 40 GbE example design is not available for following selections:
- Use external MAC PLL
- Custom streaming client interface
- On the Example Design tab, select the Simulation option to generate the testbench, and select the Synthesis option to generate the hardware example design.
Note: At least one of the Simulation and Synthesis check boxes from Example Design Files must be selected to allow generation of Example Design Files.
- For Generated HDL Format, only Verilog is available.
- For Target Development Kit select the Arria 10 GX Transceiver Signal Integrity Development Kit. The hardware example design overwrites the selection (in step 4) with the device on the target board.
- Click the Generate Example Design button.