Visible to Intel only — GUID: nik1412546857737
Ixiasoft
5.1. Understanding the Design Steps for CvP Initialization Mode
5.2. Understanding the Design Steps for CvP Initialization Mode with the Revision Design Flow
5.3. Understanding the Design Steps for CvP Update Mode
5.4. Bringing Up the Hardware
5.5. CvP Debugging Check List
5.6. Known Issues and Solutions
5.2.1. Downloading and Generating the High Performance Reference Design
5.2.2. Workaround for a Known Issue with Transceiver Reconfiguration Controller IP Core
5.2.3. Creating an Alternate user_led.v File for the Reconfigurable Core Region
5.2.4. Setting up CvP Parameters for CvP Initialization Mode
5.2.5. Creating CvP Revisions of the Core Logic Region Using the CvP Revision Design Flow
5.2.6. Compiling both the Base and cvp_app Revisions in the CvP Revision Design Flow
5.2.7. Splitting the SOF File for the CvP Initialization Mode with the CvP Revision Design Flow
5.3.1. Downloading and Generating the High Performance Reference Design
5.3.2. Workaround for a Known Issue with Transceiver Reconfiguration Controller IP Core
5.3.3. Creating an Alternate user_led.v File for the Reconfigurable Core Region
5.3.4. Setting up CvP Parameters for CvP Update Mode
5.3.5. Creating CvP Revisions of the Core Logic Region Using the CvP Revision Design Flow
5.3.6. Compiling the Design for the CvP Update Mode
5.3.7. Splitting the SOF File for the CvP Update Design Mode
5.3.8. Splitting the SOF File for the CvP Update Mode with the CvP Revision Design Flow
6.3.1. Altera-defined Vendor Specific Capability Header Register
6.3.2. Altera-defined Vendor Specific Header Register
6.3.3. Altera Marker Register
6.3.4. CvP Status Register
6.3.5. CvP Mode Control Register
6.3.6. CvP Data Registers
6.3.7. CvP Programming Control Register
6.3.8. Uncorrectable Internal Error Status Register
6.3.9. Uncorrectable Internal Error Mask Register
6.3.10. Correctable Internal Error Status Register
6.3.11. Correctable Internal Error Mask Register
Visible to Intel only — GUID: nik1412546857737
Ixiasoft
5.2.1. Downloading and Generating the High Performance Reference Design
Follow these steps to regenerate the PCI Express High Performance Reference Design with CvP enabled:
- Download the PCIe AVST and On-Chip Memory Interface design files from the PCI Express Protocol web page. This design includes the correct pin assignments and project settings to target the Stratix V GX FPGA Development Kit.
- Unzip PCIe_SVGX_AVST_On_Chip_Mem_140.zip.
- Copy hip_s5gx_x1_g1_ast64_140.qar to your working directory.
- Start the Quartus Prime software and restore hip_s5gx_x1_g1_ast64_140.qar .
- On the Tools menu, select Qsys.
- Open top.qsys.
- On the System Contents tab, right-click DUT and select Edit.
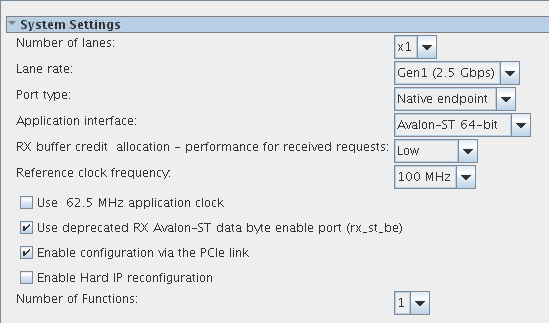
- Under System Settings, turn on Enable configuration via the PCIe link as shown in the following figure.
Figure 22. Hard IP for PCI Express Parameter Editor
- Click Finish.
- On the Generation tab, specify the settings in the following table. Then click Generate at the bottom of the window.
Table 13. Qsys Generation Tab Settings Parameter Value Create simulation model
None
Create testbench Qsys system
None
Create testbench simulation model
None
Create HDL design files for synthesis
Verilog Create block symbol file (.bsf)
Leave this entry off.
Path
< working_dir> top
Simulation
Leave this entry blank.
Testbench
<working_dir> /top /synthesis
Figure 23. Qsys Generation Window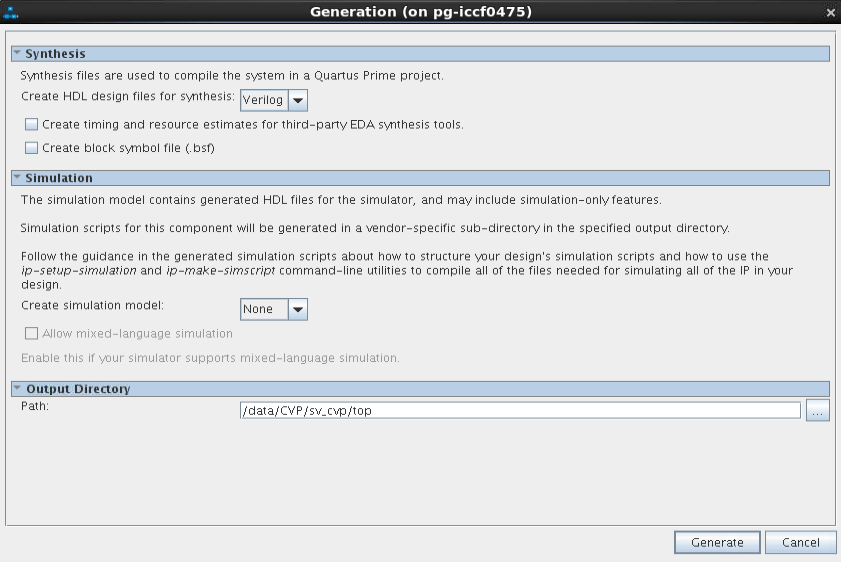
- After successful compilation, close Qsys.
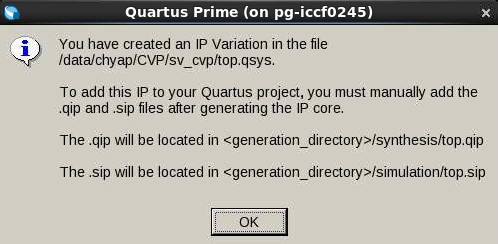
- After creating an IP Variation, to add this IP to your Quartus project, you must manually add the .qip and .sip files.
The .qip is located in <working_dir>/synthesis/top.qipThe .sip is located in <working_dir>/simulation/top.sipFigure 24. Intel® Quartus® Prime Reminder
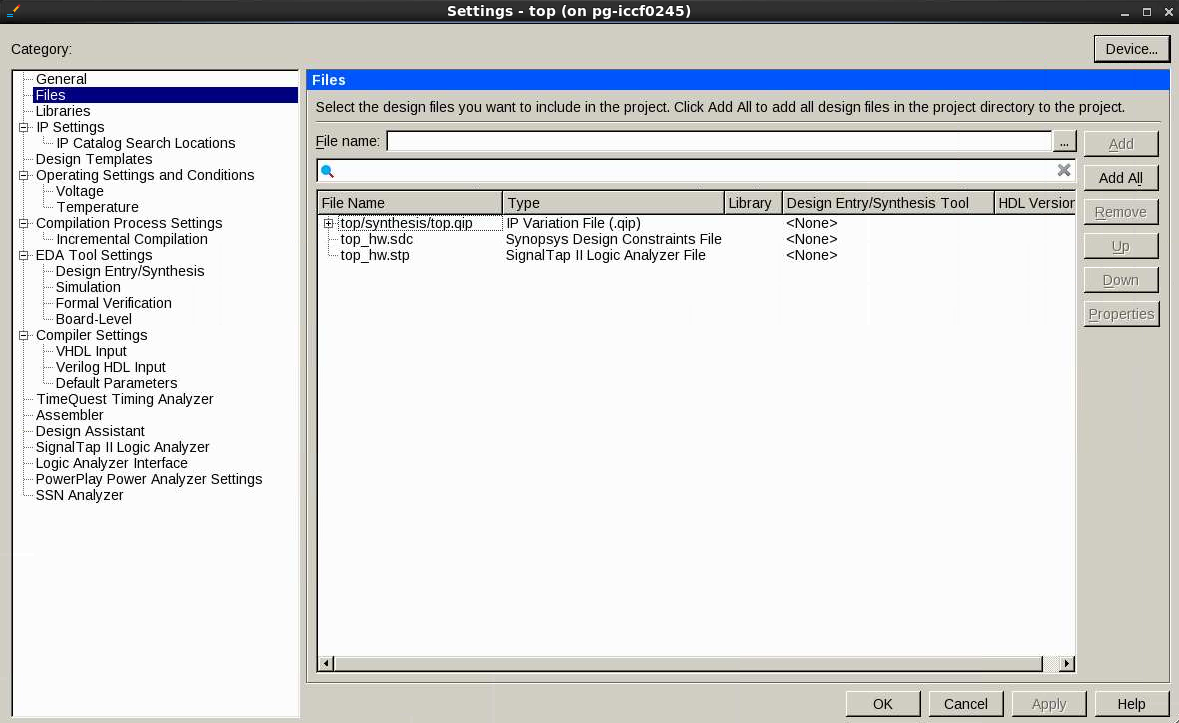
- On the Assignments menu, select Settings.
- In the Files category, remove the existing top.qip IP Variation File.
- Browse to the new top.qip file created after generating the IP Core, located in <working_dir>/synthesis/top.qip.
- Click Add and OK to close the Settings window.
Figure 25. Settings Window
Related Information